welcome to AudienceGraph
create your first event
Start here to show the AudienceGraph Dashboard and create your first event. Tap + to proceed. Choose a name that your viewers will see when they join the event. Enter a brief description. If your event is chosen to be featured on the AudienceGraph events page, this description will be displayed. You'll see instructions later on how to livestream your event. Viewers will see a greeting video until you add a livestream link to AudienceGraph.
Add start and end times and tap Go to create your event. These are optional. Note that if you choose not to add start and end times, AudienceGraph will not be able to record user sentiment during your event.
create topic buttons to get feedback
Create topic buttons to get feedback from your viewers. A topic button is described by a few words and a 👍 or 👎 Some examples of topic buttons are 👎 Webinars, 👍 Employee Rewards, 👎 Boring Slide Decks
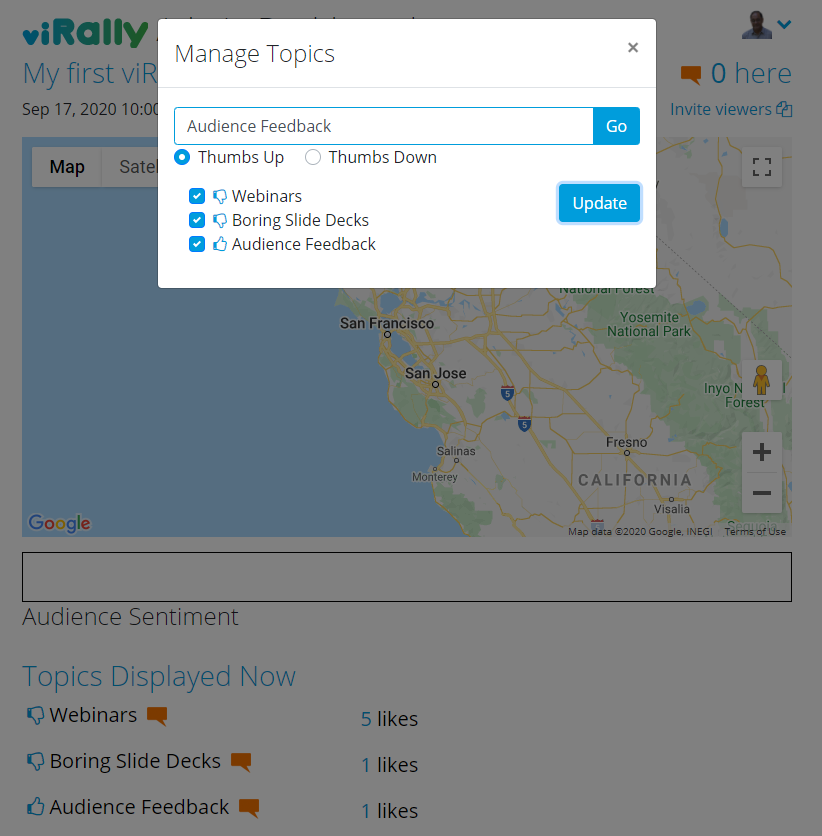
Select Topics from the dropdown menu next to your picture at the top left of the page. When you're choosing topic buttons, focus on what you want viewer feedback about. If you are doing a video conference about a new product, you might add 👍 topic buttons for the features or benefits that you provide to your users or 👎 topic buttons for the pain points you solve.
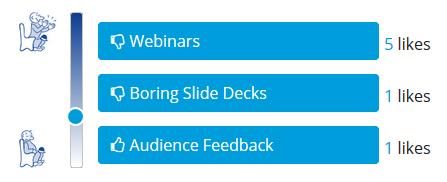
Users like your topic by tapping the topic button. You can start chats with users who like a topic by tapping the chat bubble next to the topic. A viewer can tap a topic button multiple times to express how much they like it. Your page will show how many likes a topic has gotten so far.As you'll see later, you can also add special offers and discounts by adding actions when you send chats to your users.
Add multiple topics before your conference starts and have some or all of them appear on your viewer's pages. Change which topics are shown as you progress through your event by selecting or deselecting them and tapping Update.
add action buttons for chats
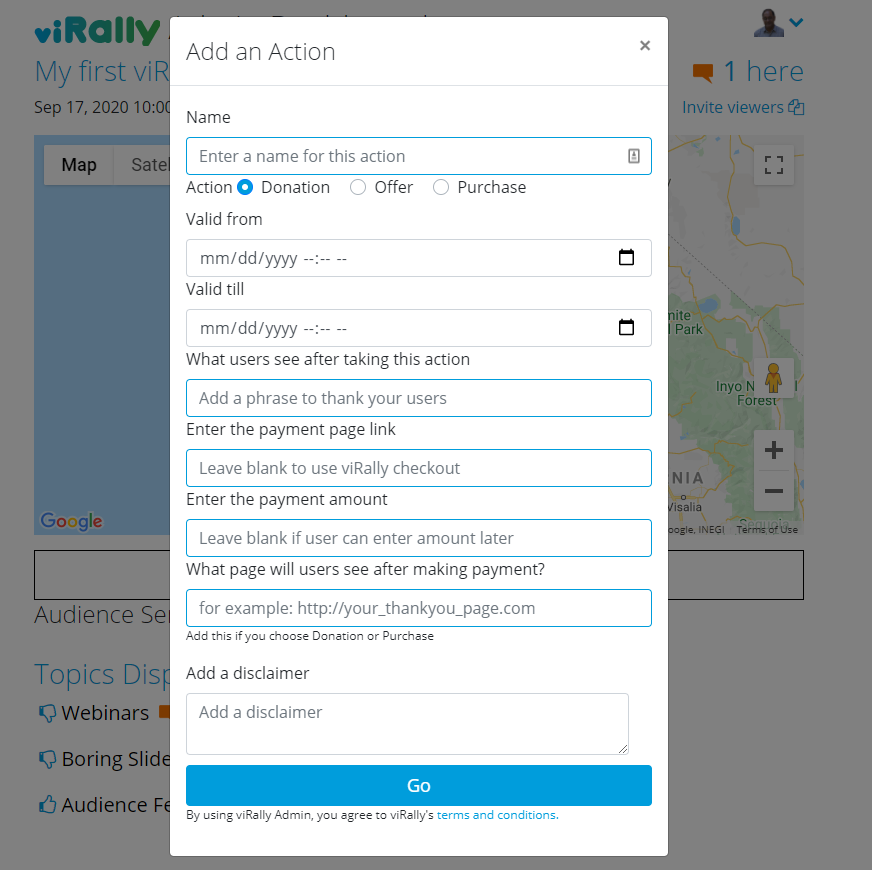
Actions make your chats come alive and give you opportunities to drive users to your web site with discounts and offers. During a chat you can add special offers, discounted purchases and requests for donations. Select Actions from the drop down menu to create an action.
Add a name and choose the type of action. You can choose from Donation, Offer or Purchase. Use donations or purchases if you want to collect a payment from your organization's web page, or have AudienceGraph do it for you via Stripe. Add an Offer if you would like the user to take advantage of a current offer or special discount you are running. Actions optionally have a validity period that you can select.
Add a message for your users when they take this action. This will either be displayed in the popup where the details of your offer are presented or will show on the AudienceGraph payment page. Enter a payment page link if you are using your company's fulfillment system. Leave it blank to use AudienceGraph checkout. Then enter the payment amount. You can leave the amount blank if you are soliciting donations so your viewers can choose the amount. Enter a page that users will see after making payment. Leave this blank to use a standard AudienceGraph page that acknowledges the payment. Optionally, add a disclaimer that covers this action if required by your organization.
Tap Go to create this action. When you send a chat, you will be able to add this action or any others you have created.
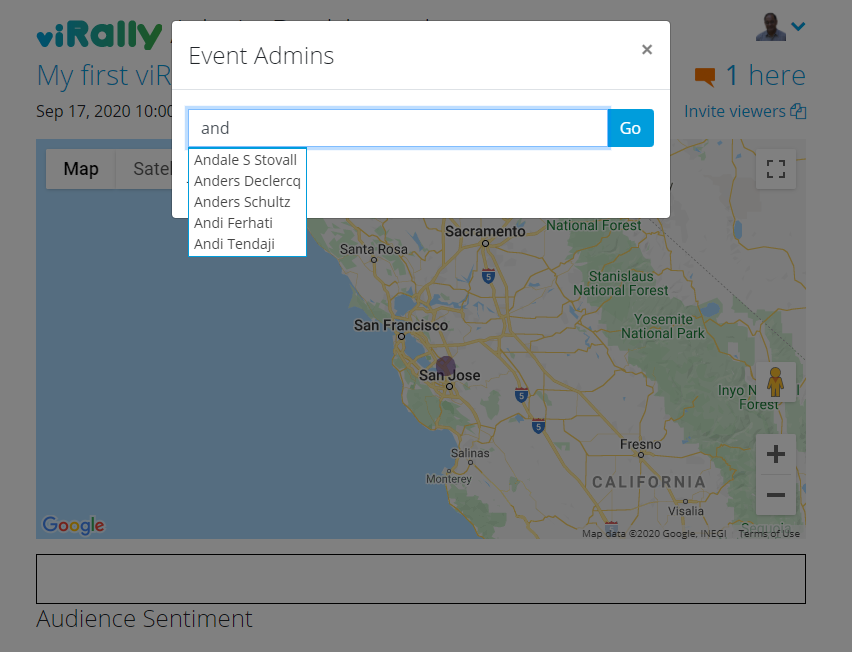
choose admins to help you
the dashboard
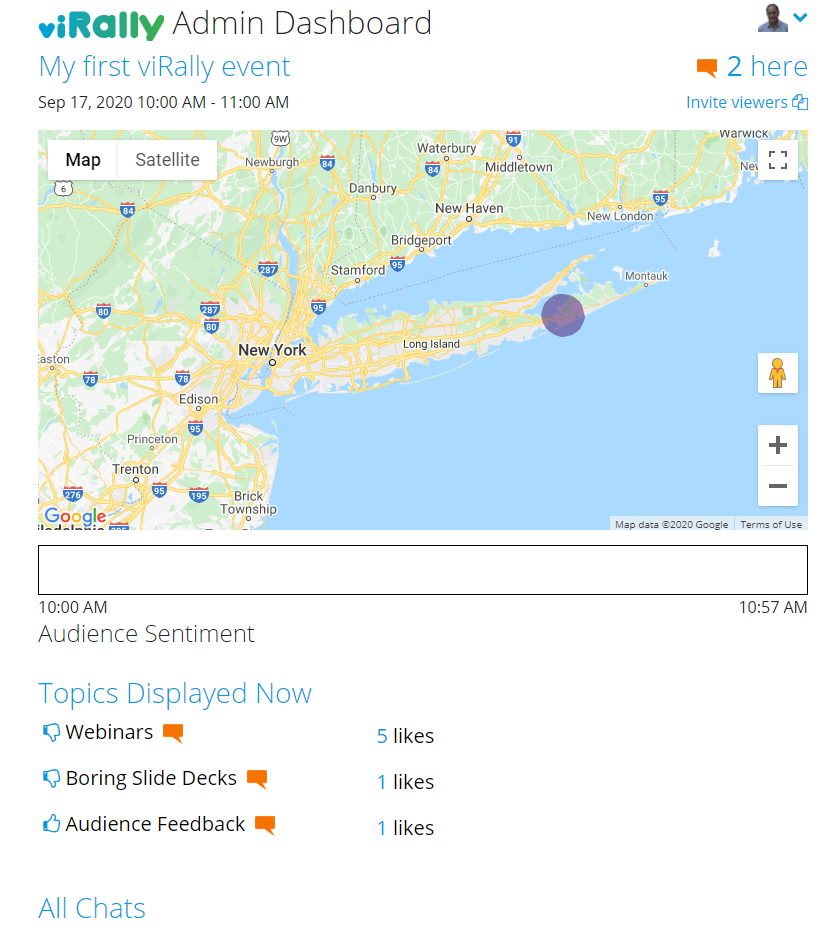
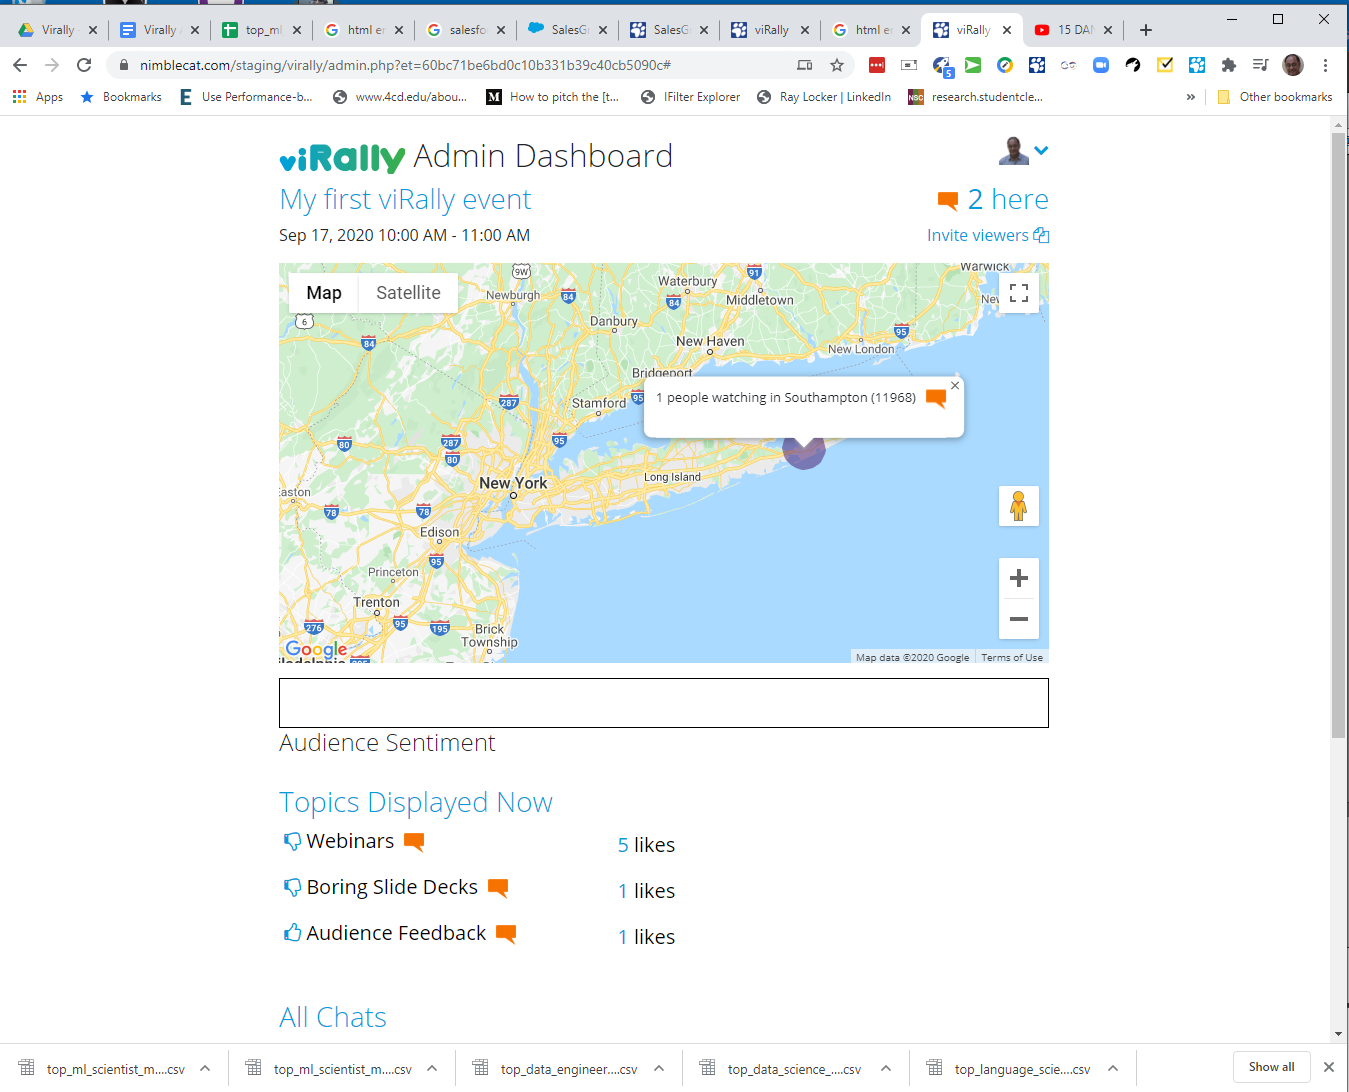
Once you've created your event, you will see the event displayed on the Admin Dashboard. Click the Invite link in the top right corner to get a link to invite viewers. You can email this link to your users or share it on a platform like LinkedIn or Facebook. Your viewers will be prompted to create a AudienceGraph login if they don't have one yet.
The map shows you where your users are. Move your cursor over one of the purple circles that indicates some viewers to see how many there are in that area. Want to send them a chat? Tap the chat icon. A chat window will open up below your topics.
Viewers can indicate how excited or bored they are by your presentation by moving a slider. This measure of audience sentiment is continuously aggregated and presented in the audience sentiment chart.
The Topics area displays the topics that are active on viewer's screens right now. You can choose the topics that are currently displayed from the Topics menu. The number of people who like the topic is shown next to it. To chat with viewers who like a topic, tap the chat button next to the topic.
The area below topics shows all your chats. Tap any chat to view it and respond to others. If there are new chats, the New Chats button at the top right of your page will appear.
before you start your event
Before you start your event, you will need to find out how to livestream the video conference so that AudienceGraph can display it. Most video conference systems including Zoom, Cisco Webex, Google Meet can be livestreamed to YouTube. Click on the links above for instructions.
You must create a personal YouTube account and request YouTube to authorize it for livestreaming. You may also use a corporate or brand account that is is already authorized. YouTube takes a minimum of 24 hours to authorize a personal account for livestreaming so please give yourself plenty of time before planning your first event.
ready set go!
- Send invites to your users ahead of the event.
- Don't try to run the event all by yourself if possible. Ask a colleague to be the admin.
- If you expect a large and geographically dispersed audience, choose more than one admin and assign specific regions to each person.
- Add members of your sales team as admins so they can engage with viewers during the event.
Remember that all livestream systems have a time delay that could be as much as 30 seconds. Take that into account when sending chats and switching topic buttons, so your viewers have the right context.

If you want to see what your event looks like to viewers, open the viewer link in a separate browser window and position it so you can see both the admin window and the viewer window simultaneously. If you do this while the event is live, mute the sound in the viewer window because it will be delayed.
Return to the dashboard a few minutes before your event starts. Get the livestream link for your event from the video conference system you're using. Tap the Add Livestream link at the top right of your AudienceGraph Dashboard and add the livestream link. Your viewers will start seeing your livestream in a few minutes. Have a great event!

